Updated 03 Feb 2016
Contents
I've been using Git for almost a year now (Thanks to @robcthegeek for introducing Git to @JustGiving). Before using Git I preferred SVN I've also suffered The Fail Server (TFS). The zero friction workflows and performance achieved with Git made me realise the friction of centralised version control systems. This post is a step-by-step guide for anyone using Windows who wants to get up and running on Git.
Introduction
Very brief introduction to Git (if you already know about Git skip this) there are plenty of links in this post to give you more in-depth information:
Git was developed by Linus Torvalds the father of Linux for Linux kernel development, Git is DVCS source control which stands for Decentralized Version Control System, which means developers can work on code locally without being connecting to a network, because developers work locally there are usually many local repositories at least one for each developer this removes the centralized single point of failure.
Working on a local repository means most operations perform better than a centralised repository because generally there is no network traffic involved (except when cloning, pulling or pushing). Git also supports distributed workflows meaning you get all the advantages of a centralised repository too.
Installing Git
We are going to install Git using Git for Windows you can also install Git using Cygwin (Unix like environment emulation for Windows). I've never used Cygwin but from what I have read, it doesn't perform as well as Git for Windows (Git for Windows is native).
First let's download and run the latest Git for Windows installer https://git-for-windows.github.io/.
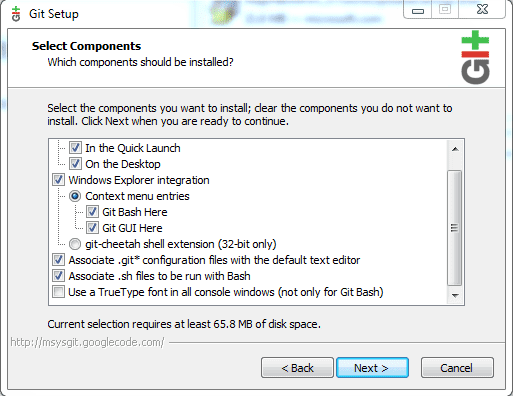
Now take the defaults and keep clicking Next until you get to the 'Select Components' screen. Here you want to select 'Git Bash here' and 'Git GUI here' this adds the Windows shell extensions so that Git Bash is available when you right mouse click in Windows explorer.
Keep clicking Next and take the defaults until Git for Windows is installed.
Configuring Git
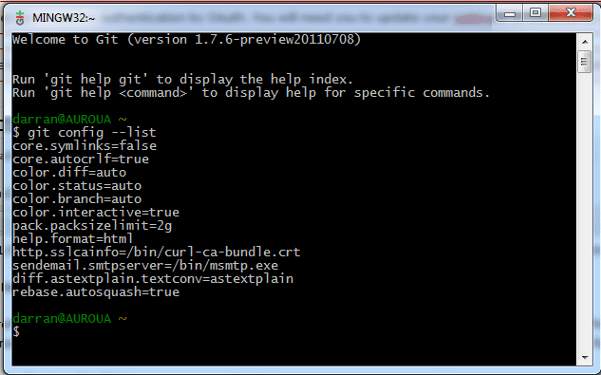
Let's open Git Bash (there's now a shortcut on your desktop) for the first time then type git config --list, you should see something similar to the following:
core.autocrlf=true should be in the list if you selected the defaults when installing. If it isn't in the list or set to false type:git config --system core.autocrlf trueIt is important this is set in a Windows environment there is nothing worse than Visual Studio complaining about line endings every time you open a file.Git was designed for use with Linux, so it is case-sensitive by default, so we need to tell Git that the Windows file system is case-insensitive.
It is very important you follow this step we didn't set this @JustGiving and ended up with a situation where some developers were pushing changes to website and other developers to Website which took some time to resolve.To make Git case-insensitive type:
git config --global core.ignorecase trueNext, we need to add a Git username and email address this is what will be used for the commit history. To add your username type:
git config --global user.name "your name here"To add your email address type:
git config --global user.email "your email here"We need to tell Git What to do by default when pushing we can either push the current branch to a branch of the same name by typing:
git config --global push.default currentOr by default, push the branch to the branch you are tracking by typing:
git config --global push.default trackingMore on git-config
Installing TortoiseGit
TortoiseGit is a UI for Git it is a Windows shell extension that adds the most frequently used Git commands when you right mouse click in Windows explorer. TortoiseGit is a Git clone of TortoiseSVN so if you are familiar with TortoiseSVN TortoiseGit should make sense.To install download and run the latest TortoiseGit installer http://download.tortoisegit.org/tgit/.
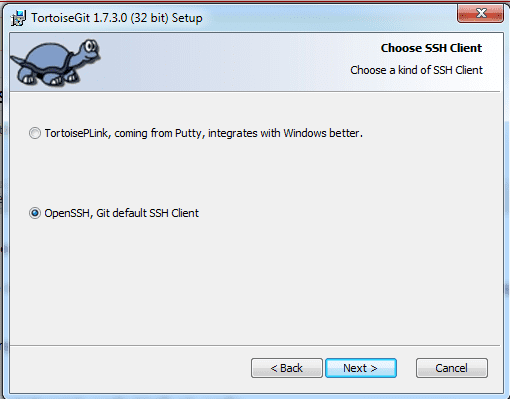
Take the defaults and keep clicking on Next until you get to the 'Choose SSH Client' screen, here I recommend selecting 'OpenSSH, Git default SSH Client'. I've had a better experience with this setting as it allows you to use the same generated SSH keys with both Git Bash and TortoiseGit see GitHub further on in the post.
Keep clicking Next and take the defaults until TortoiseGit is installed.
Visual Studio
Since VS 2013 you can use Git with Visual Studio. Another simple solution that actually works quite well on all VS versions is to add the TortoiseGit commands as external tools.The Basics
Now you have Git for Windows and TortoiseGit installed, it's time to go through some of the basics of using Git Bash and TortoiseGit. I personally prefer TortoiseGit but not all the Git commands are available, so it is good to be able to use both.
Cloning
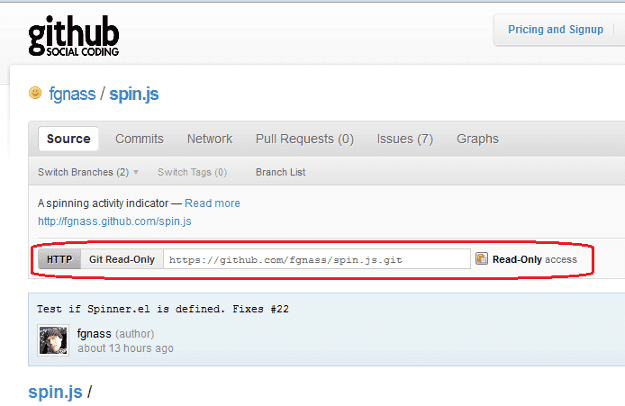
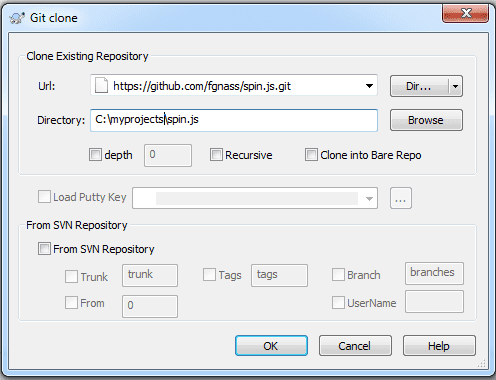
If you want to work on someone else's project the first thing you want to do is a 'git clone'. Git clone creates a local copy of the repository (including all the commit history), any branches, creates remote tracking branches and checks out the currently active branch usually 'master'.Let's say we want to clone (or fork) Spin.js from GitHub to our own local repository located at C:\myprojects\spin.js
To clone Spin.js from GitHub - from Git Bash type:
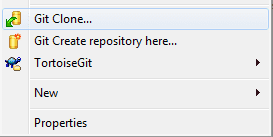
git clone "https://github.com/fgnass/spin.js.git" "C:\myprojects\spin.js"Tortoise Git - from Windows explorer right mouse click:
Committing locally
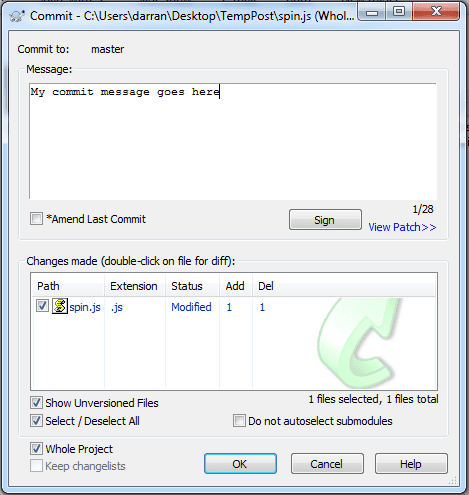
Now we have a cloned repository make some changes to any of the files in C:\myprojects\spin.js then use the following commands to commit to your local repository.First, we need to change to the folder that we cloned the remote repository to - from Git Bash type:
cd /c/myprojects/spin.jsThen use 'git commit', 'git commit' commits your changes locally only - from Git Bash type:
git commit -m "My commit message goes here" -aTortoise Git - from Windows explorer right mouse click on the spin.js folder:

Pulling
A 'git pull' does a 'git fetch' followed by a 'git merge' this is the command you run to bring your local repository up to date with the remote repository in our case spin.js from GitHub. Git will automatically merge any changes if possible, but you will have to resolve any conflicts. The more frequently you pull the more up to date your local repository will be and less conflicts will need resolving.To pull switch.js from the remote repository on GitHub - from Git Bash Type:
git pullTortoise Git - from Windows explorer right mouse click on the spin.js folder:

Branching
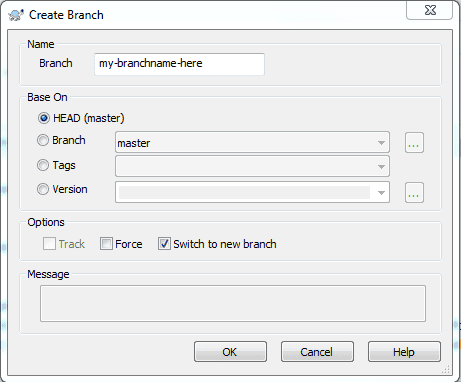
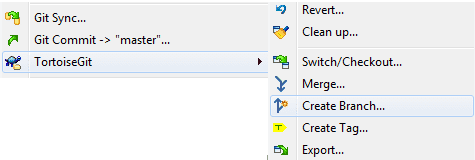
Unlike other source control systems such as TFS branching in Git is trivial, because it is trivial to create branches you can Keep 'master' clean with released code only. It is worth spending some time deciding on a branching workflow that suits your needs.To create a branch based on the current branch in our case 'master' - from Git Bash Type:
git branch "my-branchname-here"To switch to the branch "my-branchname-here" so you can work on it - from Git Bash Type:
git checkout "my-branchname-here"Tortoise Git - from Windows explorer right mouse click on the spin.js folder:
Creating a distributed repository
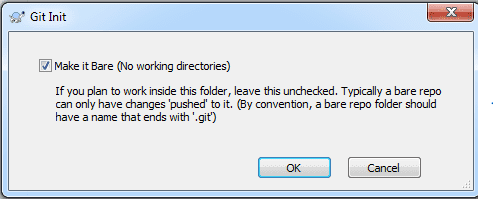
We have now covered the basics of working with a repository locally, what about working with a distributed repository? To create a distributed repository usually we start with a 'bare' repository. A 'bare' repository contains the version control information but no working folders of files, it is mainly used for distributed (public) repositories where developers 'push' their changes from their local repository to the distributed repository. GitHub for example is a collection of distributed repositories.To create a 'bare' repository on c:\mydistributedproject.git (.git is the recommended convention for distributed repositories), first create and change to the folder where want to create the 'bare' repository - from Git Bash type:
mkdir /c/mydistributedproject.gitcd /c/mydistributedproject.gitThen create the 'bare' repository - from Git Bash type:
git --bare initTortoise Git - from Windows explorer right mouse click on the mydistributedproject.git folder:

Now you have a 'bare' repository, you can share the folder to make it available to other developers (of course, you could have created the 'bare' repository directly on the server). It's worth noting to create a repository for you to work on locally omit --bare.
You can now clone your repository change to the folder you want to clone to and from a git bash type:
git clone "/c/mydistributedproject.git"Or if you created a share:git clone "//myserver/myshare/mydistributedproject.git"Now add a file to your local repository and then from Git Bash type:
git add --allThen commit your changes locally. From Git Bash type
git commit -m "Added new file." -aPushing
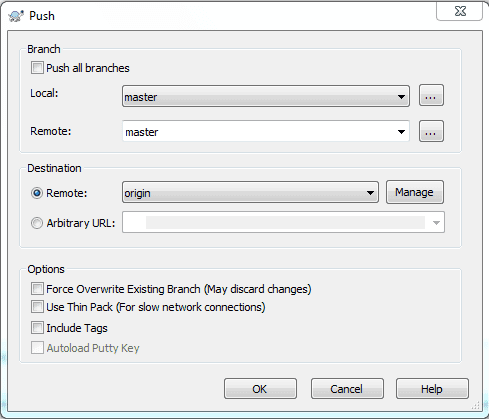
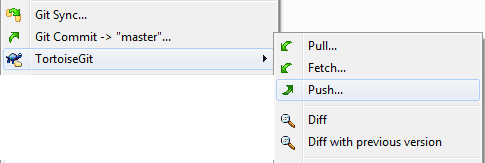
Pulling updates your local repository with changes from the remote repository, so the opposite pushing updates the remote repository with changes from your local repository.Now we have an empty distributed repository, we can now 'push' our changes to the empty. To push your changes for the first time from Git Bash type:
git push "/c/mydistributedproject.git" masterOr if you created a share:git push "//myserver/myshare/mydistributedproject.git" masterTortoise Git - from Windows explorer right mouse click on the cloned folder:
Now you have pushed the master branch and its changes to the remote repository you can simply (if you configured git as per this post) type git pull or git push to pull and push changes.
The general workflow for working with a distributed repository (after creating a branch if required) commit -> pull -> push, because Git is so quick it is good practice to pull and push frequently.
Using a file share is fine for learning the basics of Git and working on small projects. But if you are going to use Git for your source control your will want to set up a server or better still use GitHub.
GitHub
GitHub is awesome because it removes the hassle of hosting distributed repositories. It also adds the social element to source control with features like being able to follow friends, commit comments, and my favourite being able to send 'pull requests' to the original developers of a forked repository.
GitHub is free for public repositories, and there is a small monthly charge for private repositories, I use GitHub myself for my own projects. If you followed my instructions for installing Git working with GitHub is trivial.
Create a GitHub account https://github.com/signup/free
Create your own repository http://help.github.com/create-a-repo/
Open Git GUI then click on Help -> Show SSH Key
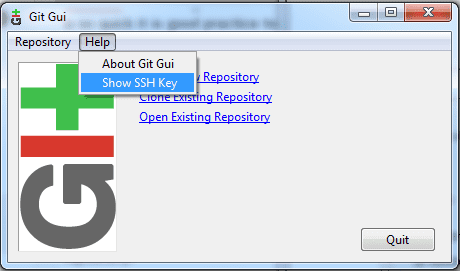
Click on the Generate Key button:
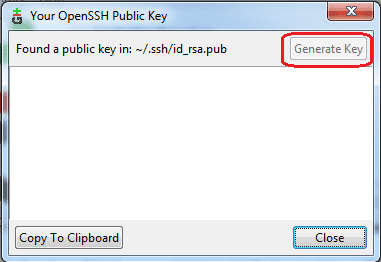
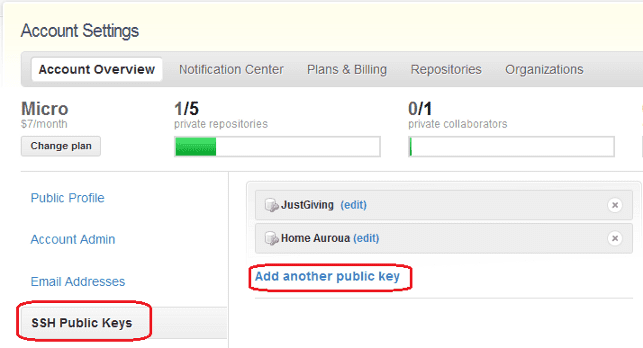
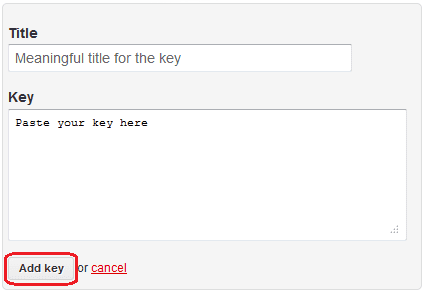
Copy the generated SSH key to your GitHub account.
Now you can clone your repository and commit, pull and push as usual.
For example, my own repository

git clone "git@github.com:DalSoft/NWidget.git"You will need to create one SSH key for each machine you use.
Conclusion
I've only scratched the Git surface, but I hope this post has helped you get started. Git is awesome, but there's a lot to learn I've been using Git for a while, but I'm still learning new tricks.
Further reading
Below are some links with more in-depth information:
http://gitref.org/http://git-scm.com/documentation
http://progit.org/book/
http://www.kernel.org/pub/software/scm/git/docs/user-manual.html
